You are here
Quick Start
This lengthy manual page gives you a full walkthrough of your first steps with iRedTouch.
At the end you have a fully working remote and a good overview on the features.
IR Module configured and online?
Make sure that your module is configured and online. It is strictly recommended to give a static IP address to your modules. This will make startup of iRedTouch faster and ensures that the module can be found reliably. In some network configurations iRedTouch won't find your module at all!
Start iRedTouch
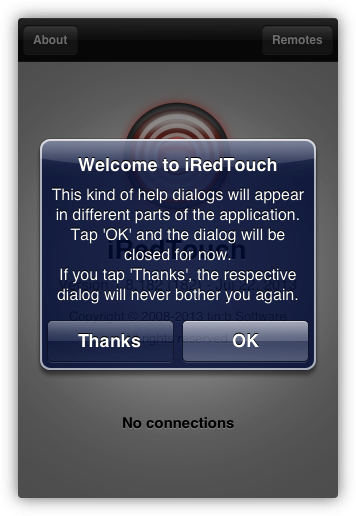
On 1st start you will see the first of a bunch of help panels which appear all over the app. With one tap you can make the respective help vanish for ever, but every help dialog will appear at least once:
After closing this help panel you see the start screen:

These are your options:
- Tap "Remotes" to access the list of your remotes
- Tap About for info about iRedTouch and access to support
- At the bottom you see the connection info, which shows you connected modules at a glance
Remotes
Tap Remotes to go to the list of your remotes. Initially there will be no remotes, we will change that later.
![]()
Tap the wrench icon to go to the settings page ...
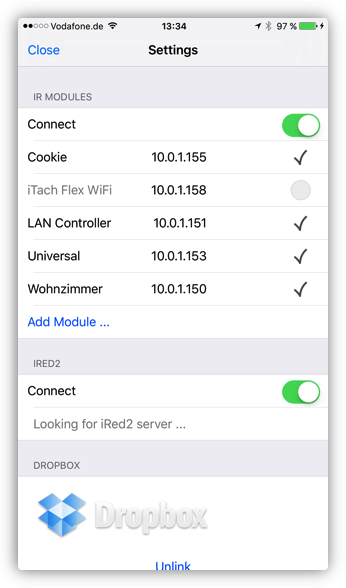
Settings
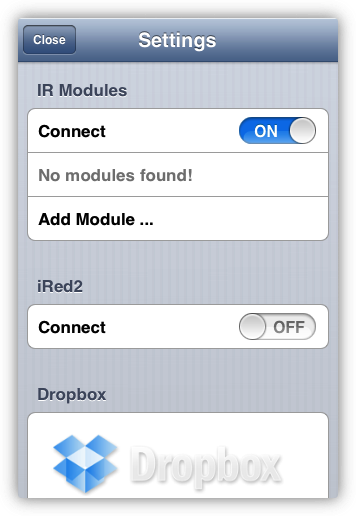
It is recommened to now go to the Settings page to configure your IR modules.
Initially there are no modules configured. Tap Add Module ... to add one:
Add IRTrans module
If you have an IRTrans module, you'll have to enter the IP address manually.
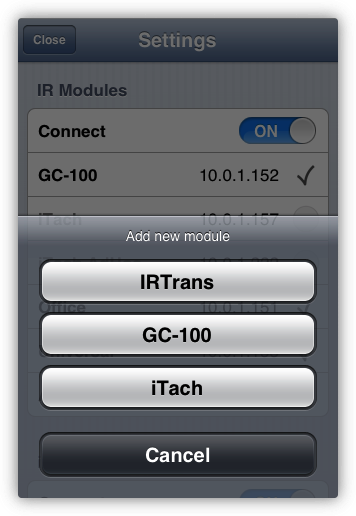
At first tap Add Module on the settings page, then choose IRTrans:
On the next page, enter the name and the IP adress of the module, then tap Done on the keyboard:
![]()
![]()
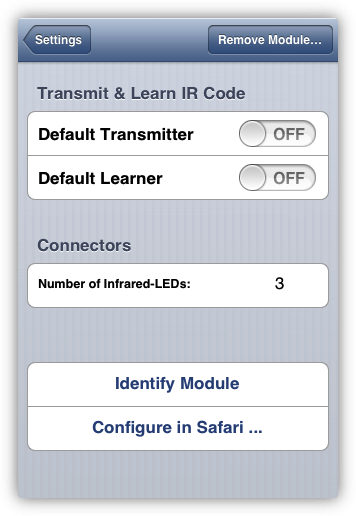
Enter the number of external (not internal) LEDs of the module. My IRTrans WiFi module has no externals. Some IRTrans modules have up to 16 external LED connectors, built-in serial connectors or even relays. Just enter the respective number of connectors. You can tap Identify Module if you are not sure which of your modules you are configuring - the IRTrans red LED will flash for a second.
![]()
Add Global Cache (iTach) module
If you have a module by Global Caché, adding a module is easy. Tap "Add Module..." on the Settings page. A dialog asks you which kind of module you want to add:
Tap "iTach". The configuration page appears, and after a help dialog you simply tap "Read Module Data...":
![]()
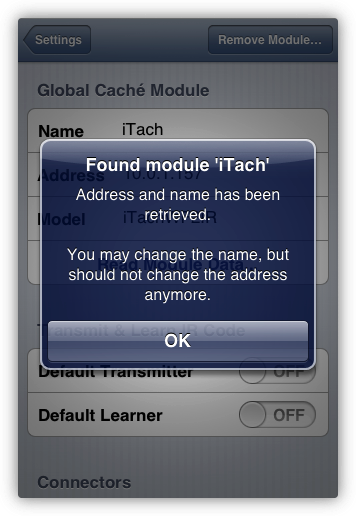
iRedTouch will now wait for a so-called beacon message of the iTach or other GC module. These are sent once a minute at least, so it may take up to one minute:
![]()
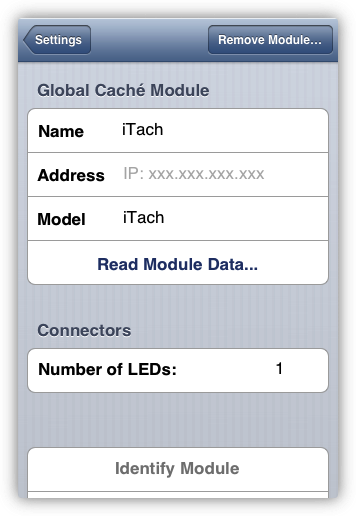
If a module is found, address and name are filled in automatically:
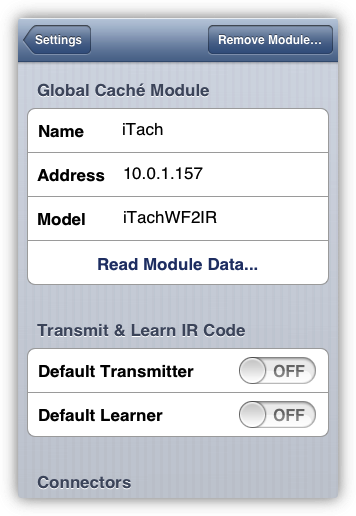
You can change the name but should not change the IP anymore. In general, the other settings are already done, but you may change the LED number if you have special requirements. With other iTach modules you will see one serial connector (iTach WF2SL or iTach IP2SL) or three relay connectors on the iTach WF2CC or iTach IP2CC.
You can tap Identify Module if you are not sure which of your modules you are configuring. On the iTach WF2IR, the three green LEDs beneath the LED connectors are flashing for some seconds. On the GC-100 the LED above the power connector will flash, on IRTrans the red transmission LED will flash.
Edit Module Settings
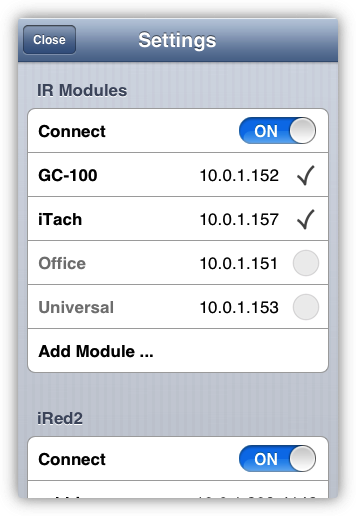
In the meantime I have configured all my modules:
You can switch off modules by tapping on the checkmark or edit a module's setting by tapping its name:
![]()
Now that all settings are done, let's go to create a remote. Close the Settings page and tap "Remotes" on the main page.
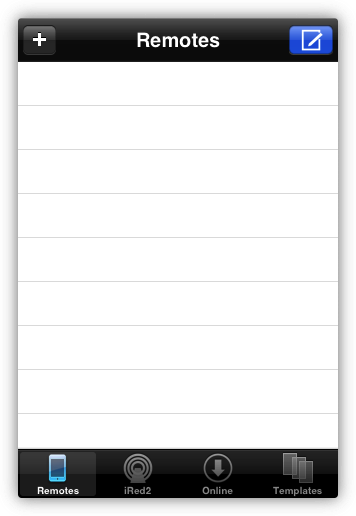
Remotes List
On 1st start the list of remotes is looking not too good. Tap "Edit" and let's create a remote:
![]()
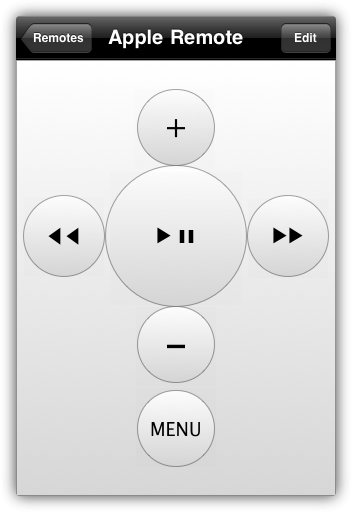
Tap "+" and the editor page appears, with the text cursor waiting for a name of the new remote. In this example I will create a "Apple Remote" ...
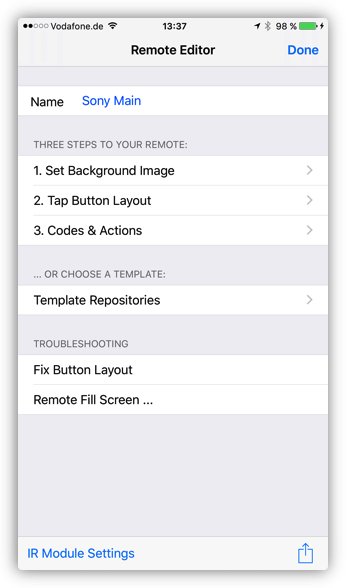
Remote Editor - Set Name
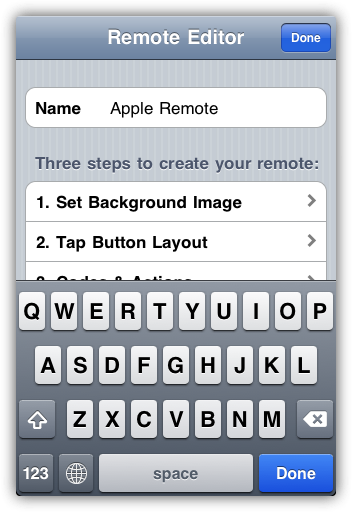
Tap "Done" if you are finished with the name. This is the Editor main page which let's you access the three major steps of creating a remote:
Remote Editor - Set Background Image
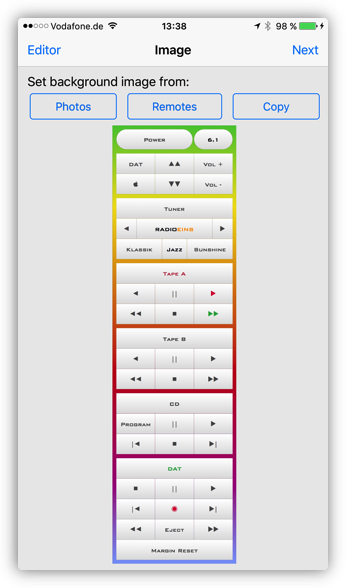
Tap "1. Set Background Image". On the next page you'll see the iRedTouch logo as a placeholder, but you'll soon set the background image from three sources:
- Photos: From your iPhone's photo library
- Remotes: Take Background image of existing remote, online or on device
- Copy: Takes the Copy which you took seconds before on Safari or Photos app
![]()
For now we will choose Remotes, then Templates at the bottom:

There are more options at the bottom, but now we tap the Remote ID 0 and look if it fits:
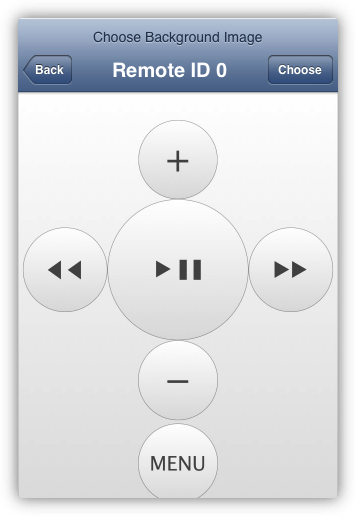
Tap "Choose" and the background is set:
Remote Editor - Layout Buttons
Tap "Next" to go to the 2nd step in creating a remote, the Layout:
![]()
For every remote button you want to tap on later, you'll have to specify the area where to tap. This does not need to be 100% exact but the areas should not overlap. Tap with one finger on the image to set some button areas:
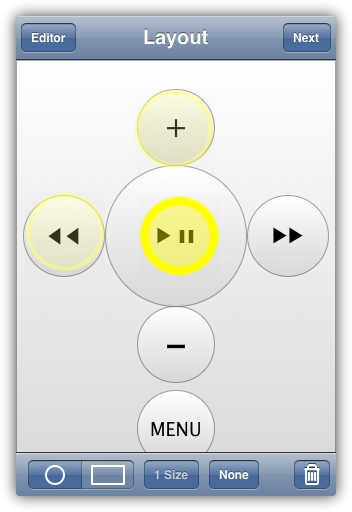
The last tapped button is highlighted - and it does not fit the large round button on the image. Simply pinch with two fingers anywhere (!) on the image to resize the circle area:
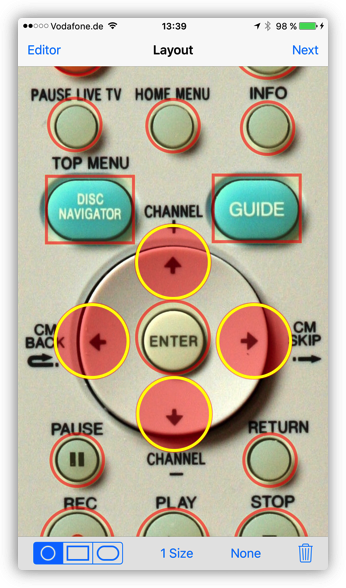
Tap the selected button again to unselect it.
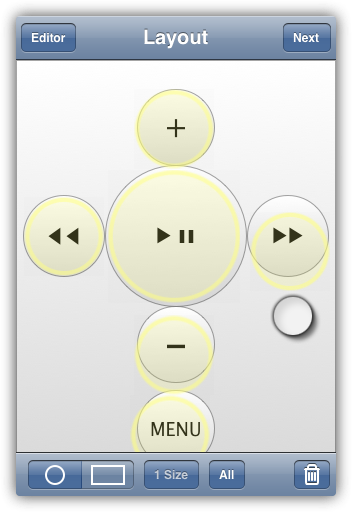
Some buttons on the bottom:
- Choose button type from Circular to Rectangular or Rounded Rectangle
- Tap "1 Size" and all selected buttons will get the size of the button selected at first.
- Tap None to delesect all buttons. When nothing is selected, the button changes to Select All
- Delete selected buttons will ask you for confirmation, if teh button already has an action set.
To move a button, hold down your finger on a button - which does not need to be selected (!) - then move your finger. The button will "jump up" from beneath your finger, so you can easily adjust the position with no finger hiding the image. The virtual finger in this illustration is just moving the rightmost button:
Remote Editor - Learn IR Codes
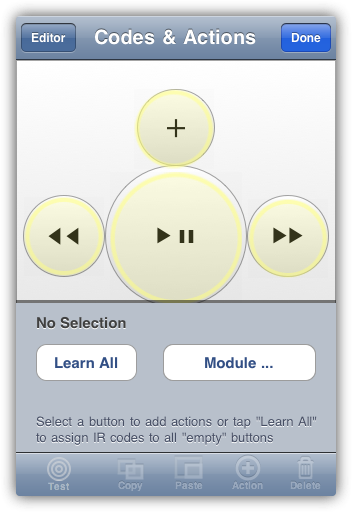
With all buttons placed, let's go to the next and final step: learning the codes:
If you only have one IR module, please skip the next step.
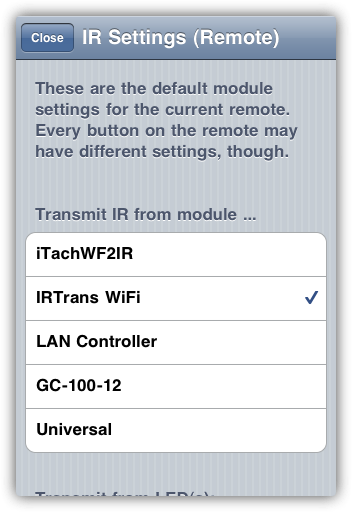
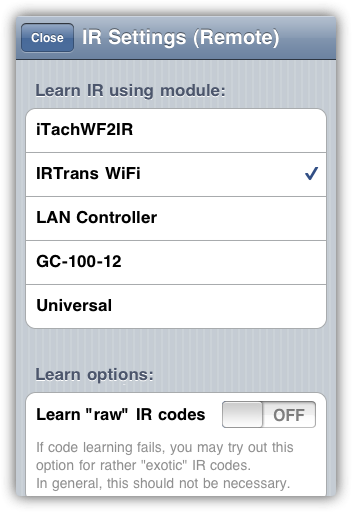
For every remote you can determine which if your IR modules should be used. You can even tell every single button to use a different module (see later). Tap "Module ..." to set the remote's module. Here you can choose which module to be used for learning and for transmitting the IR codes:
"Close" this setting to start learning.
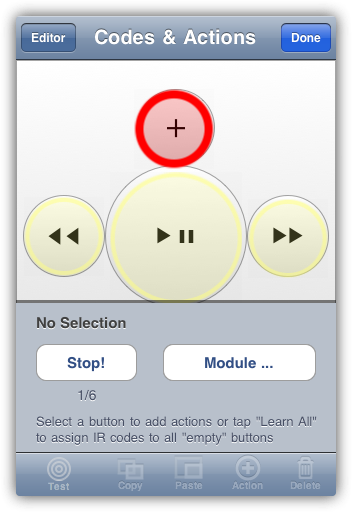
If you simply want to learn all codes of the remote you just have created, tap "Learn All" and the learning assistant will start.
iRedTouch will highlight the button to be learned, and your part is to transmit the respective code to the IR module. So make sure to have your "real remote" at hand before tapping "Learn All".
To learn a IR code reliably, every kind of module may have a different "optimal" learning distance. The IRTrans and the GC-100 with GC-IRL learner in general learn fine from 2 ft. to 10 ft. An IRTrans with universal learning receiver requires a lower distance: 1 ft. at max! The iTach needs an even closer distance. In my experiments I need to go as close as possible to the small hole besides the power connector to get IR codes learned.
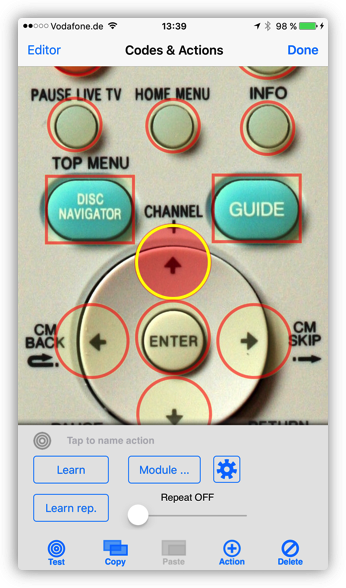
When learning is going on, the red highlight jumps from one button to the next, and you only have to press the real remote accordingly:
Everything's red, everything's learned:
That's it!
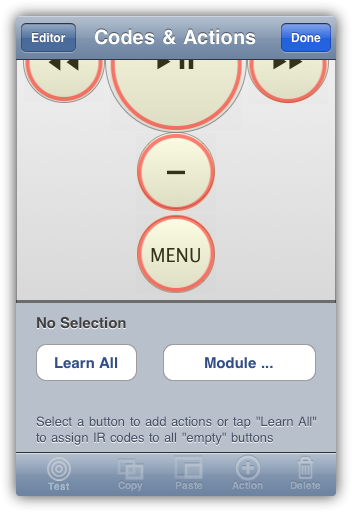
If you want to test a single code, or you need to re-learn a code, tap a button to select it and the editor changes to this view:
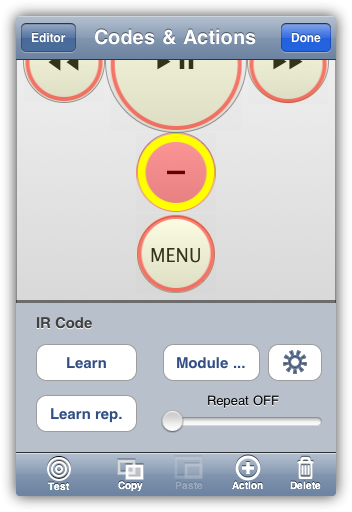
At the bottom you find several functions which will be explained in a separate chapter.
Tap "Done" at the top and your first remote is ready to be used: