| < Previous |
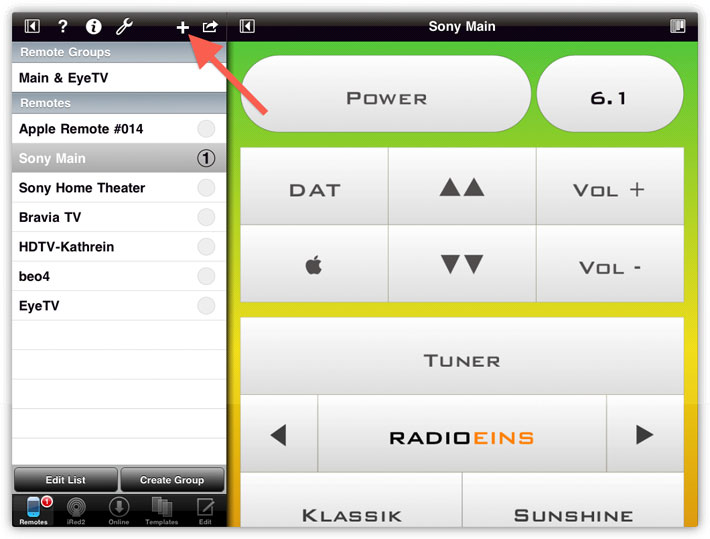
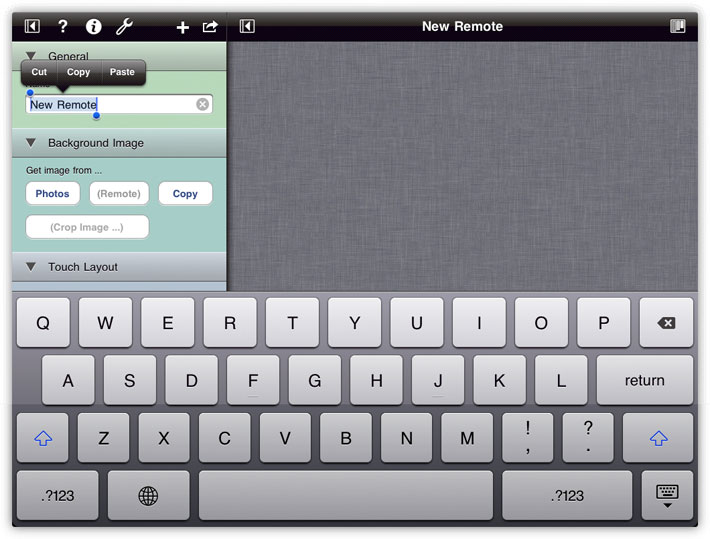
iRedTouch changes to Edit Mode and selects the default name, ready for you to type in a new name:
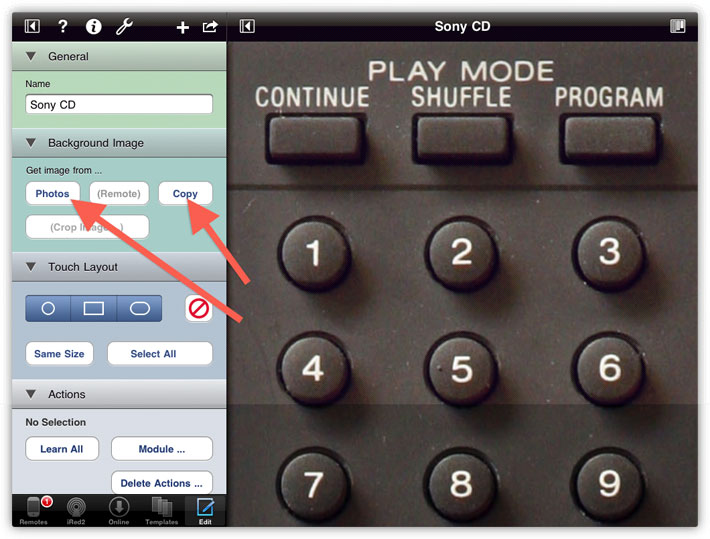
After naming this new remote "Sony CD", I'll add the background image.
You can choose one from your built-in Photos Album, or choose a copy from an image, for example made in Safari, then tap on Copy. The image is displayed:
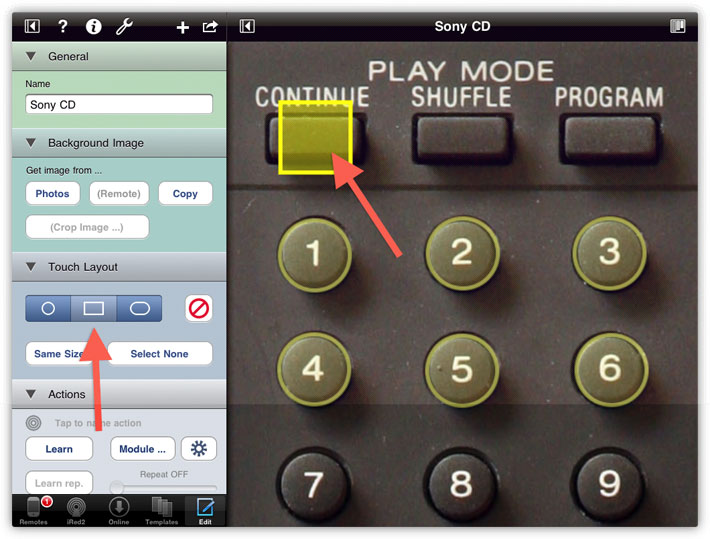
Now tap the buttons onto the image, i.e. the areas where you later want to tap on:
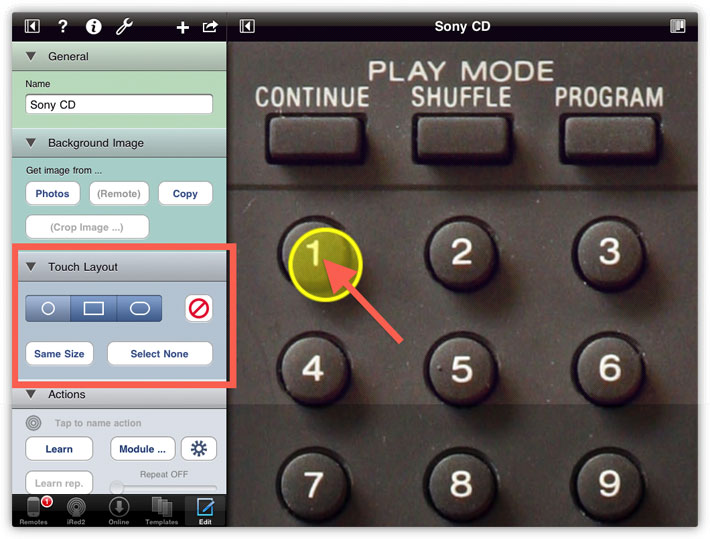
The yellow buttons are not visible later, they only serve as touch sensitive areas. However, you can move the buttons around with one finger, or give it one of three different shapes:
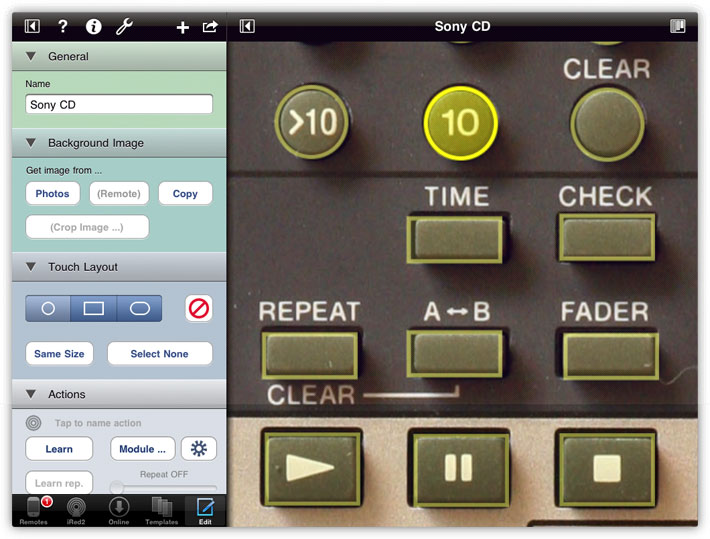
To resize a button, hold two fingers anywhere (!) on the image, wait a second, then pinch.
Please note, that the button which is cureently selected is used as a template for the next new button. So in my example, I only have to resize the rectangular button once, then tap on the next buttons.
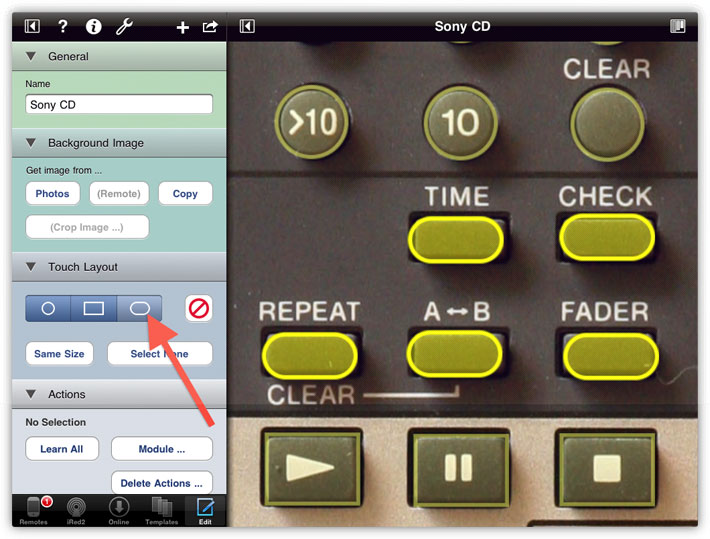
Now all buttons are placed:
To change the shape or position of multiple buttons at once, tap on one button, then double-tap onto the following ones to make a multi-selection. Then all selected buttons are affected at once, e.g. by changing their shape to "rounded" or by resizing using two fingers:
Tap the Edit button at the bottom to see your new remote on top of the list of your remotes:
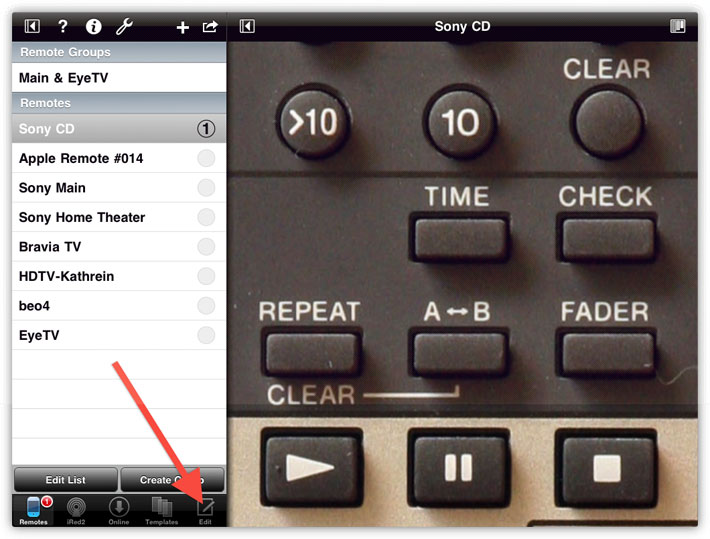
Tapping on this remote will do - nothing! We have not yet added any actions, especially IR codes, to the remote. Please proceed to the next chapter.
| < Previous |